The following services are available to use in your application in Cloud Foundry’s cloud:
- MySQL, the open source relational database
- MongoDB, the scalable, open, document-based database
- Redis, the open key-value data structure server
- RabbitMQ, for messaging
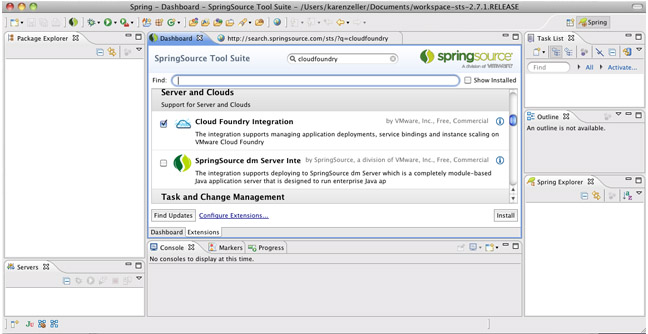
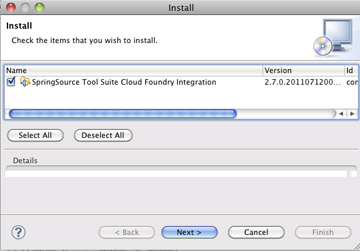
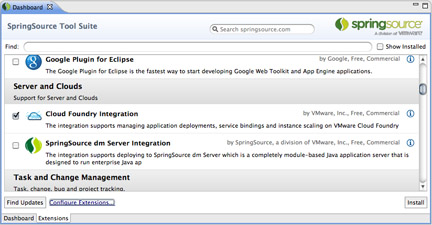
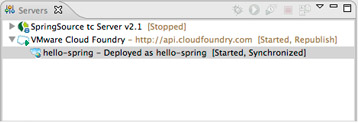
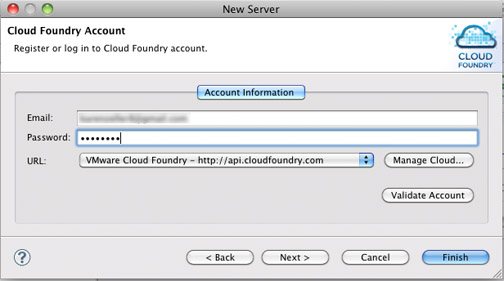
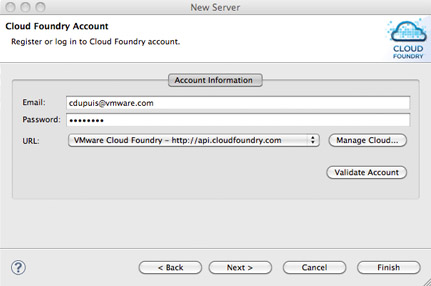
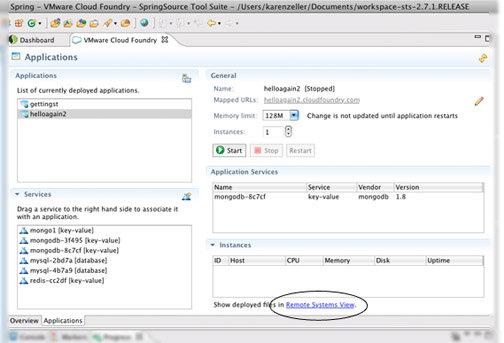
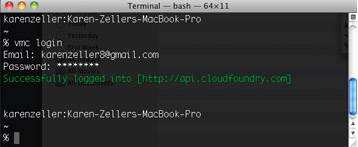
After you develop your application to integrate any one of these services locally, you can use standard Cloud Foundry client commands (vmc, SprintSource Tool Suite, or the Eclipse plugin) to add, bind, unbind, and delete these service in the cloud.
Note: Make sure you have the latest version of vmc if you are using it: vmc -v, and if needed gem update vmc
MySQL
Cloud Foundry supports MySQL for your application, if you plan to use MySQL it as service, we recommend you also have MySQL running locally in your development environment.
Here is the process to follow whether using MySQL or another relational databases on your local/development environment:
List the respective gem for that database as a dependency in your application’s Gemfile, e.g. “gem ‘mysql2, ‘< 0.3’”.
Before you pushing the application to the cloud, run
bundle package
bundle install
Push or update your application:
vmc push, or
vmc stop appname, vmc update appname
vmc create-service mysql –bind appname
This creates mysql as a service at Cloud Foundry and binds it to your application.

If you updated your application, vmc start appname
MongoDB
This scalable, open source, document-oriented database is provided as a service at Cloud foundry. This section describes how you can create Rails and NodeJS applications using the service.
Ruby on Rails
This tutorial is based on Rails 3.0 and Ruby 1.9. You can use Rails 2.3.5 or Ruby 1.8.7, we recommend you also use Bundler to manage your application Gem dependencies.
Prerequisites
Cloud Foundry account and vmc
Local installation of MongoDB
MongoMapper, (optional) an object-relational mapper (ORM).
Creating an Application
Create your new application:
rails new my_app --skip-active-recordAdd required gem dependencies to your application Gemfile:
gem “mongo_mapper”
gem “thin”
For Rails applications, Cloud Foundry is currently configured to use Thin as the one web server so we add it.
gem “bson_ext”
Here we also add BSON for serialization of JSON-like documents; you will need it to interface with MongoDB’s ruby driver.

Run bundle install, so gem dependencies are loaded.
Create your application. In the application root folder:
rails g scaffold messages message:string --orm mongo_mapperThis creates an application via Rails scaffolding where the model uses MongoMapper rather than Active Record. The application contains a single table messages with a single column of type string.
(Optional) Updating Routes. Here we update config/routes.rb so the application root points to messages by default:
root :to => “messages#index”
delete public/index.html from your application

Create a configuration file to communicate with MongoDB at Cloud Foundry:
rails g mongo_mapper:configThis creates a basic config/mongo.yml file in our application that we will modify to have our credentials, host, and port for Cloud Foundry in JSON.

Modify the production section of config/mongo.yml
production:
    host: <%= JSON.parse(ENV['VCAP_SERVICES'])['mongodb-1.8'].first['credentials']['hostname'] rescue 'localhost' %>
    port: <%= JSON.parse( ENV['VCAP_SERVICES'] )['mongodb-1.8'].first['credentials']['port'] rescue 27017 %>
    database:  <%= JSON.parse( ENV['VCAP_SERVICES'] )['mongodb-1.8'].first['credentials']['db'] rescue 'cloud_foundry_mongodb_tutorial' %>
    username: <%= JSON.parse( ENV['VCAP_SERVICES'] )['mongodb-1.8'].first['credentials']['username'] rescue '' %>
    password: <%= JSON.parse( ENV['VCAP_SERVICES'] )['mongodb-1.8'].first['credentials']['password'] rescue '' %>
Deploying an Application
Push the application:
vmc push –runtime ruby19
vmc will ask if you want to bind any services:
Select 2 (mongodb)
Provide a name or choose the default
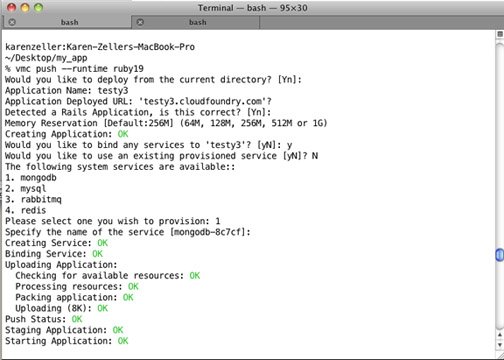
Open your browser to the url selected when you pushed the application to view it.

NodeJS
Before you get started, you will need these tools:
Cloud Foundry account and vmc
Local installation of MongoDB
NodeJS for your development machine
Code for these examples can be found at GitHub
Setup
Start mongod on your local environment. At the command prompt:
mongod
Confirm node.js is correctly installed:
Run node and the interactive javascript console will start
Check that Node Package Manager (NPM) is installed: at the command line, enter NPM -v

vmc target api.cloudfoundry.com
vmc login
Enter your username and password
Create Application Files
Create an application directory: mkdir appname
Change to that directory: cd appname
Create a file app.js
Add a Simple Web Server
In app.js, add the code:
var port = (process.env.VMC_APP_PORT || 3000);
var host = (process.env.VCAP_APP_HOST || 'localhost');
var http = require('http');

http.createServer(function (req, res) {
    res.writeHead(200, {'Content-Type': 'text/plain'});
    res.end('Hello World\n');
}).listen(port, host);
console.log('Server running at localhost:3000');
This creates a NodeJS web server using port 3000 on localhost that will respond to any HTTP request with ‘Hello World.’
node app.js
Your NodeJS web server starts.

In another terminal window send a request: curl localhost:3000

Stop the node: Control-C
Push the application to Cloud Foundry: vmc push
Cloud Foundry detects node.js and asks for configuration options, including a name and the services we want.
Select ‘y’ to bind a service
Select ‘1’ for mongodb
Select default service name
Cloud Foundry stages and starts your application.
curl appname.cloudfoundry.com
Your application in the cloud will return ‘Hello World.’

Add MongoDB Configuration
Here we update the application so that it will use the Cloud Foundry service it is in on the cloud, or it will use your local mongodb instance.
We add this to app.js:
if (process.env.VCAP_SERVICES){
    var env = JSON.parse(process.env.VCAP_SERVICES);
    var mongo = env['mongodb-1.8'][0]['credentials'];
}
else {
    var mongo = {
        "hostname":"localhost",
        "port":27017,
        "username":"",
        "password":"",
        "name":"",
        "db":""
    }
}

var generate_mongo_url = function(obj){
    obj.hostname = (obj.hostname || 'localhost');
    obj.port = (obj.port || 27017);
    obj.db = (obj.db || 'test');
    if(obj.username && obj.password){
        return "mongodb://" + obj.username + ":" + obj.password + "@" + obj.hostname + ":" + obj.port + "/" + obj.db;
    }
    else{
        return "mongodb://" + obj.hostname + ":" + obj.port + "/" + obj.db;
    }
}

var mongourl = generate_mongo_url(mongo);
The if conditional will provide two different sets of information, depending on if the application is on the cloud or running locally. The generate_mongo_url creates appropriate connection information for MongoDB and it it then assigned to mongourl.
Test app.js locally:
node app.js
in another terminal, curl localhost:3000
Update the cloud application: vmc update
Test it: curl appname.cloudfoundry.com
Using MongoDB Drivers
Install MongoDB native drivers locally: npm install mongodb
This create a new local directory for the driver in the application root, node_modules.
To use the drivers on at Cloud Foundry, we provide a different path. At the top of the app.js:
require.paths.unshift(‘./node_modules’);
Using MongoDB
Now we built functionality in our application that uses MongoDB. In this example we record a visit/request to our server and then print the last ten visits:
We create a new function, record_visit that will store the server request to MongoDB:
var record_visit = function(req, res){
    /* Connect to the DB and auth */
    require('mongodb').connect(mongourl, function(err, conn){
        conn.collection('ips', function(err, coll){
            /* Simple object to insert: ip address and date */
            object_to_insert = { 'ip': req.connection.remoteAddress, 'ts': new Date() };
/* Insert the object then print in response */
/* Note the _id has been created */
    coll.insert( object_to_insert, {safe:true}, function(err){
if(err) { console.log(err.stack); }
        res.writeHead(200, {'Content-Type': 'text/plain'});
        res.write(JSON.stringify(object_to_insert));
        res.end('\n');
        });
    });
});
}
Here we use the .connect method to connect to MongoDB using either the local or Cloud Foundry mongourl. Then we use the .collection(‘ips’ ….) method to add the request information to the data that will be committed.
Update the http.createServer method. Here we are updating this function so it calls the record_visit function when the server request is made:
http.createServer(function (req, res) {
    record_visit(req, res);
}).listen(port, host);
Test app.js locally and on the cloud:
node app.js then curl localhost:3000
vmc update, then curl appname.cloudfoundry.com

After we test, we create a function that will actually output information from MongoDB. In this case we add a function print_visits that prints that last 10 visits/requests:
var print_visits = function(req, res){
    /* Connect to the DB and auth */
    require('mongodb').connect(mongourl, function(err, conn){
        conn.collection('ips', function(err, coll){
            coll.find({}, {limit:10, sort:[['_id','desc']]}, function(err, cursor){
                cursor.toArray(function(err, items){
                    res.writeHead(200, {'Content-Type': 'text/plain'});
                    for(i=0; i<items.length;i++){
                        res.write(JSON.stringify(items[i]) + "\n");
                    }
                    res.end();
                });
            });
        });
    });
}
Then we update the createServer method again to call the new function, print_visits:
http.createServer(function (req, res) {
    params = require('url').parse(req.url);
    if(params.pathname === '/history') {
        print_visits(req, res);
    }
    else{
        record_visit(req, res);
    }
}).listen(port, host);
In this case, requests to the web server will either add the current visit to MongoDB (the default) or if this url request has ‘/history’ it will output the last 10 visits.
Test app.js locally:

Stop the application, update it: vmc update

Test the cloud version:
curl appname.cloudfoundry.com, and
curl appname.cloudfoundry.com/history

All the server requests have been recorded on Cloud Foundry’s MongoDB service.
Redis
Redis is an open source key-value store, also known as a NoSQL database. You set, get, update and delete information using a key.
For any application written in Ruby, such as applications in Rails or Sinatra, follow this process:
Add the gem to your application’s Gemfile
gem 'redis'Load the library into your application’s runtime. In Rails, for instance you would use the require statement in application.rb. In Sinatra, you would add this to your .rb configuration file.
require 'redis'Configure your environment so it can locate the Redis service on the cloud:
configure do
    services = JSON.parse(ENV['VCAP_SERVICES'])
    redis_key = services.keys.select { |svc| svc =~ /redis/i }.first
    redis = services[redis_key].first['credentials']
    redis_conf = {:host => redis['hostname'], :port => redis['port'], :password => redis['password']}
    @@redis = Redis.new redis_conf
end
We provide credentials to connect to the Redis service as environment variables under the key VCAP_SERVICES. The values are stored as JSON so we use the JSON parser in the first line to extract it.
The last line creates a class variable @@redis which is available for all its subclasses in your application and will be used at runtime to add key/values to Redis.
In your application use the available Redis commands to edit and add key/values to the data store.
Run bundle package.
Update or add your application to the cloud:
To update
vmc stop appname
vmc update
To add: vmc push
Bind to Cloud Foundry’s Redis service:
vmc create-service redis --bind appnameFor updated applications, start again:
vmc start appname
RabbitMQ
Cloud Foundry supports RabbitMQ, the open-source message broker as a service that developers can add to their applications.
As with all other Cloud Foundry services, you can use vmc or SpringSource STS to provision, bind and remove RabbitMQ services.
The RabbitMQ service at Cloud Foundry is currently based on rabbitmq-server-2.4.1.
For more information about RabbitMQ, see these resources:
RabbitMQ Tutorials, cover the basics of creating messaging in your applications.
Language and Framework Support
All languages and frameworks supported by Cloud Foundry that have an Advanced Message Queue Protocol (AMQP) client library are also supported by the RabbitMQ service.
Applications in the following language, framework and client library combinations have been deployed on Cloud Foundry:
Java Spring applications with Spring AMQP (version 1.0.0.RC2)
Ruby on Rails and Sinatra applications with the bunny gem (version 0.7.4)
NodeJS applications with the node-amqp (version 0.1.0)
Protocol Support
RabbitMQ service supports the core protocols of RabbitMQ: AMQP versions 0-8 and 0-9-1. Other protocols will be supported by RabbitMQ plugins.
Provisioning and Binding RabbitMQ
vmc target api.cloudfoundry.com
vmc login
Provision the service: vmc create-service
Select 1, for rabbitmq
Cloud Foundry will provision the service for your cloud and name the service.
Bind the service to your application: vmc bind-service rabbitmq-name appname
Check the application:
vmc list
vmc apps
Returns a list of applications on your cloud and any associated services.
Rails and RabbitMQ
The RabbitMQ service is accessed through the AMQP protocol (versions 0.8 and 0.9.1) and your application will need access to a AMQP client library in order to use the service.
A popular AMQP client libraries for Rails is bunny; we will use it demonstrate the process you would follow:
Note: As mentioned before, if you are using Rails 2.3.5 we recommend you also use Bundler.
In Gemfile, add bunny and json (the latter is used to parse service connection data):
gem 'bunny'
gem 'json'
bundle install
Bundler fetches and installs the latest version of bunny and json for your application.
Require the gems in your controller:
require 'bunny'
require 'json'
Update the controller class to get the connection string for the service and make the connection:
# Extracts the connection string for the rabbitmq service from the
# service information provided by Cloud Foundry in an environment
# variable.
    def self.amqp_url
        services = JSON.parse(ENV['VCAP_SERVICES'], :symbolize_names => true)
        url = services.values.map do |srvs|
        srvs.map do |srv|
            if srv[:label] =~ /^rabbitmq-/
                srv[:credentials][:url]
                else
                []
            end
        end
    end.flatten!.first
end

# Opens a client connection to the RabbitMQ service, if one is not
# already open.  This is a class method because a new instance of
# the controller class will be created upon each request.  But AMQP
# connections can be long-lived, so we would like to re-use the
# connection across many requests.
def self.client
    unless @client
        c = Bunny.new(amqp_url)
        c.start
        @client = c
    end
    @client
end
Set up message queues in the controller:
# Return the "nameless exchange", pre-defined by AMQP as a means to
# send messages to specific queues.  Again, we use a class method to
# share this across requests.
def self.nameless_exchange
    @nameless_exchange ||= client.exchange('')
end

# Return a queue named "messages".  This will create the queue on
# the server, if it did not already exist.  Again, we use a class
# method to share this across requests.
def self.messages_queue
    @messages_queue ||= client.queue("messages")
end
Add controller methods to read and write messages:
# The action for our publish form.
def publish
    # Send the message from the form's input box to the "messages"
    # queue, via the nameless exchange.  The name of the queue to
    # publish to is specified in the routing key.
    HomeController.nameless_exchange.publish params[:message],
                                   :key => "messages"
    # Notify the user that we published.
    flash[:published] = true
    redirect_to home_index_path
end

def get
    # Synchronously get a message from the queue
    msg = HomeController.messages_queue.pop
    # Show the user what we got
    flash[:got] = msg[:payload]
    redirect_to home_index_path
end
NodeJS and RabbitMQ
For NodeJS applications, the approach is similar to other frameworks. RabbitMQ service is accessed through the AMQP protocol (versions 0.8 and 0.9.1) and your application will need access to a AMQP client library in order to use the service.
In this case we also recommend you use:
- npm (node package manager) to handle the dependent library
- sanitizer to handle HTML escape characters
Here is the process to generally follow; there is room to change this as needed for your application-specific logic:
Add the library dependencies to package.json:
{
    "name":"node-srs-demo",
    "dependencies":{
        "amqp":">= 0.1.0",
        "sanitizer": "*"
    }
}
In your application file, e.g. app.js, add the code connect to the service:
require.paths.unshift('./node_modules');

var http = require('http');
var amqp = require('amqp');
var URL = require('url');
var htmlEscape = require('sanitizer/sanitizer').escape;

function rabbitUrl() {
    if (process.env.VCAP_SERVICES) {
        conf = JSON.parse(process.env.VCAP_SERVICES);
        eturn conf['rabbitmq-2.4'][0].credentials.url;
    }
    else {
        return “amqp://localhost";
    }
}

var port = process.env.VCAP_APP_PORT || 3000;
The first line tells the application where the node_modules libraries are on Cloud Foundry; they just live in a different path than they do on your development environment. Then we load up our required libraries and assign them to variables we use later.
The rabbitURL function parses our credentials for Cloud Foundry as well as the URL for the provisioned RabbitMQ service. Then it connect to the service.
Set up message handling and messaging queues in your application:
var messages = [];
function setup() {
  var exchange = conn.exchange('cf-demo', {'type': ‘fanout', durable: false}, function() {
    var queue = conn.queue(", {durable: false, exclusive: true},
    function() {
      queue.subscribe(function(msg) {
        messages.push(htmlEscape(msg.body));
        if (messages.length > 10) {
          messages.shift();
        }
      });
      queue.bind(exchange.name, ");
    });
    queue.on('queueBindOk', function() { httpServer(exchange); });
  });
}
Add an HTTP listener to respond to requests and publish messages from RabbitMQ:
function httpServer(exchange) {
  var serv = http.createServer(function(req, res) {
    var url = URL.parse(req.url);
    if (req.method == 'GET' && url.pathname == '/env') {
      printEnv(res);
    }
    else if (req.method == 'GET' && url.pathname == '/') {
      res.statusCode = 200;
      openHtml(res);
      writeForm(res);
      writeMessages(res);
      closeHtml(res);
    }
    else if (req.method == 'POST' && url.pathname == '/') {
      chunks = '';
      req.on('data', function(chunk) { chunks += chunk; });
      req.on('end', function() {
        msg = unescapeFormData(chunks.split('=')[1]);
        exchange.publish(", {body: msg});
        res.statusCode = 303;
        res.setHeader('Location', '/');
        res.end();
      });
    }
    else {
      res.statusCode = 404;
      res.end("This is not the page you were looking for.");
    }
  });
  serv.listen(port);
}
Add any application helpers:
var conn = amqp.createConnection({url: rabbitUrl()});
conn.on('ready', setup);
Spring and RabbitMQ
The RabbitMQ service is accessed through the AMQP protocol (versions 0.8 and 0.9.1) and your application will need access to a AMQP client library in order to use the service. Fortunately the Spring AMQP project enables AMQP applications to be built using Spring constructs.
To use the RabbitMQ service we include the cloudfoundry-runtime jar in our Spring application; this enables access to Cloud Foundry services, including RabbitMQ.
Note: For more information about Spring AMQP, visit the reference documentation.
Add the corresponding dependencies to the application pom.xml file:
<repositories>
    <repository>
        <id>spring-milestone</id>
        <name>Spring Maven MILESTONE Repository</name>
        <url>http://maven.springframework.org/milestone</url>
    </repository>
</repositories>

<dependency>
    <groupId>cglib</groupId>
    <artifactId>cglib-nodep</artifactId>
    <version>2.2</version>
</dependency>

<dependency>
    <groupId>org.springframework.amqp</groupId>
    <artifactId>spring-rabbit</artifactId>
    <version>1.0.0.RC2</version>
</dependency>

<dependency>
    <groupId>org.cloudfoundry</groupId>
    <artifactId>cloudfoundry-runtime</artifactId>
    <version>0.7.1</version>
</dependency>
Extend the Spring Application Context XML.
These changes do the following:
Uses cloudfoundry-runtime to connect to the RabbitMQ service.
Configures RabbitTemplate and RabbitAdminthat as the main entry points to Spring AMQP.
Declares a queue called messages within the RabbitMQ broker.
<beans xmlns="http://www.springframework.org/schema/beans"
xmlns:xsi="http://www.w3.org/2001/XMLSchema-instance"
xmlns:mvc="http://www.springframework.org/schema/mvc"
xmlns:context="http://www.springframework.org/schema/context"
xmlns:rabbit="http://www.springframework.org/schema/rabbit"
xmlns:cloud="http://schema.cloudfoundry.org/spring"
xsi:schemaLocation="http://www.springframework.org/schema/mvc   http://www.springframework.org/schema/mvc/spring-mvc-3.0.xsd
                   http://www.springframework.org/schema/beans http://www.springframework.org/schema/beans/spring-beans-3.0.xsd
                   http://www.springframework.org/schema/context http://www.springframework.org/schema/context/spring-context-3.0.xsd
                   http://www.springframework.org/schema/rabbit http://www.springframework.org/schema/rabbit/spring-rabbit-1.0.xsd
                   http://schema.cloudfoundry.org/spring http://schema.cloudfoundry.org/spring/cloudfoundry-spring-0.7.xsd">


<!-- Obtain a connection to the RabbitMQ via cloudfoundry-runtime: -->
<cloud:rabbit-connection-factory id="connectionFactory"/>

<!-- Set up the AmqpTemplate/RabbitTemplate: -->
<rabbit:template connection-factory="connectionFactory"/>

<!-- Request that queues, exchanges and bindings be automatically declared on the broker: -->
<rabbit:admin connection-factory="connectionFactory"/>

<!-- Declare the "messages" queue: -->
<rabbit:queue name="messages" durable="true"/>
Update your application controller/logic.
Include the messaging libraries:
import org.springframework.beans.factory.annotation.Autowired;
import org.springframework.amqp.core.AmqpTemplate;
Read and write messages:
 @Controller
public class HomeController {
    @Autowired AmqpTemplate amqpTemplate;

    @RequestMapping(value = "/")
    public String home(Model model) {
        model.addAttribute(new Message());
        return "WEB-INF/views/home.jsp";
    }

    @RequestMapping(value = "/publish", method=RequestMethod.POST)
    public String publish(Model model, Message message) {
        // Send a message to the "messages" queue
        amqpTemplate.convertAndSend("messages", message.getValue());
        model.addAttribute("published", true);
        return home(model);
    }

    @RequestMapping(value = "/get", method=RequestMethod.POST)
    public String get(Model model) {
        // Receive a message from the "messages" queue
        String message = (String)amqpTemplate.receiveAndConvert("messages");
        if (message != null)
            model.addAttribute("got", message);
        else
            model.addAttribute("got_queue_empty", true);

        return home(model);
    }
}


